iOS platform documentation
This document describes the iOS-specific parts of NimbleApp. For the parts shared with Android, please see the main User Guide.
Contents
Getting started
To measure performance on NimbleDroid, the developer adds our open-source framework to their app. This framework is very simple, basically using iOS logging to mark the beginning and end of flows. Once the framework is installed on the app target, the developer imports the module in their source code. The framework source code is hosted on Github.
Installing the framework
Cocoapods
Add NimbleDroid to your Podfile and enable use_frameworks!
use_frameworks!

target 'HelloWorld' do
  pod 'NimbleDroid', '~> 1.0'
end
Manual install
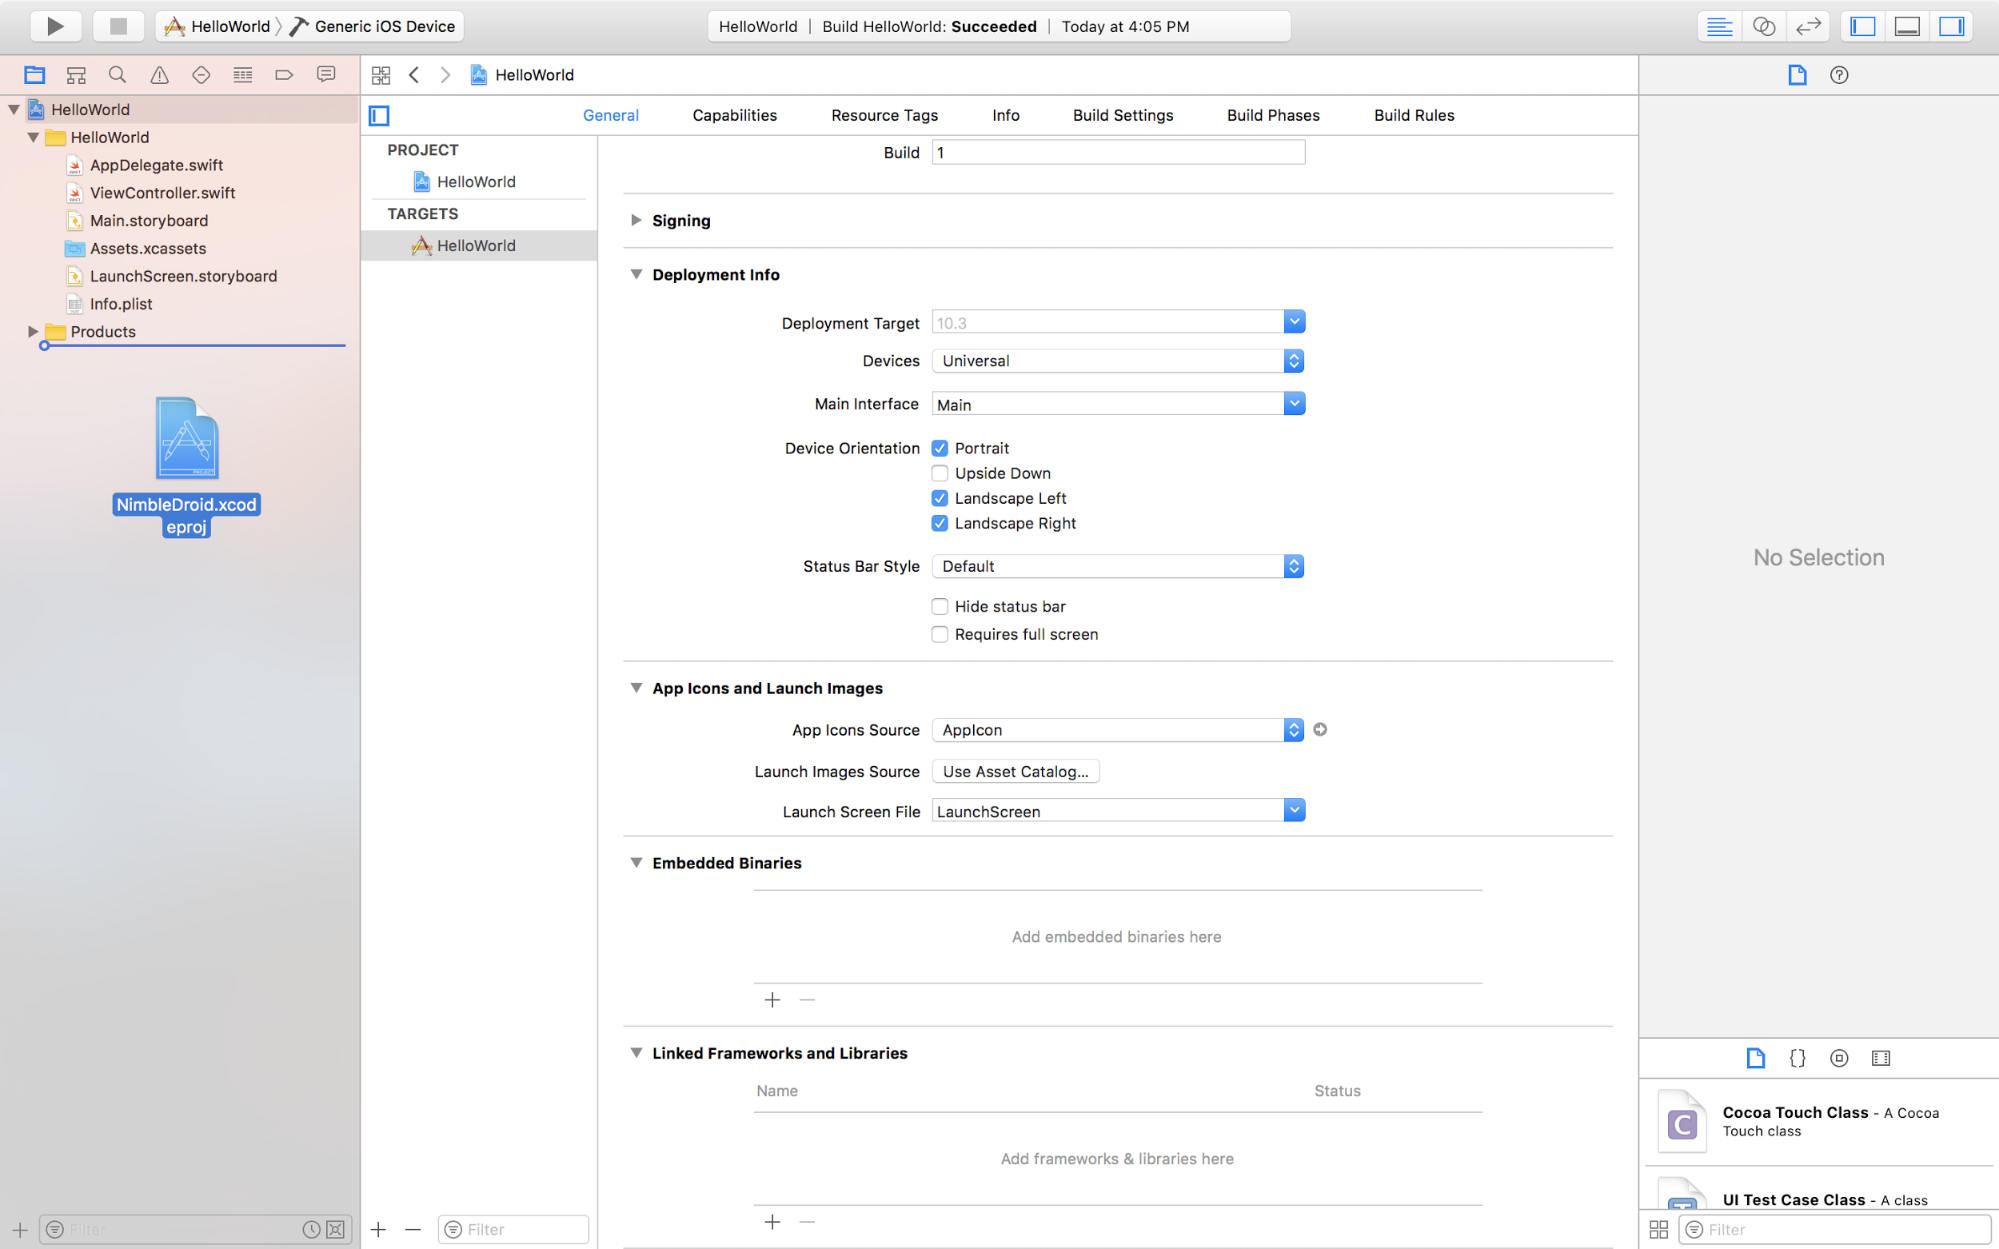
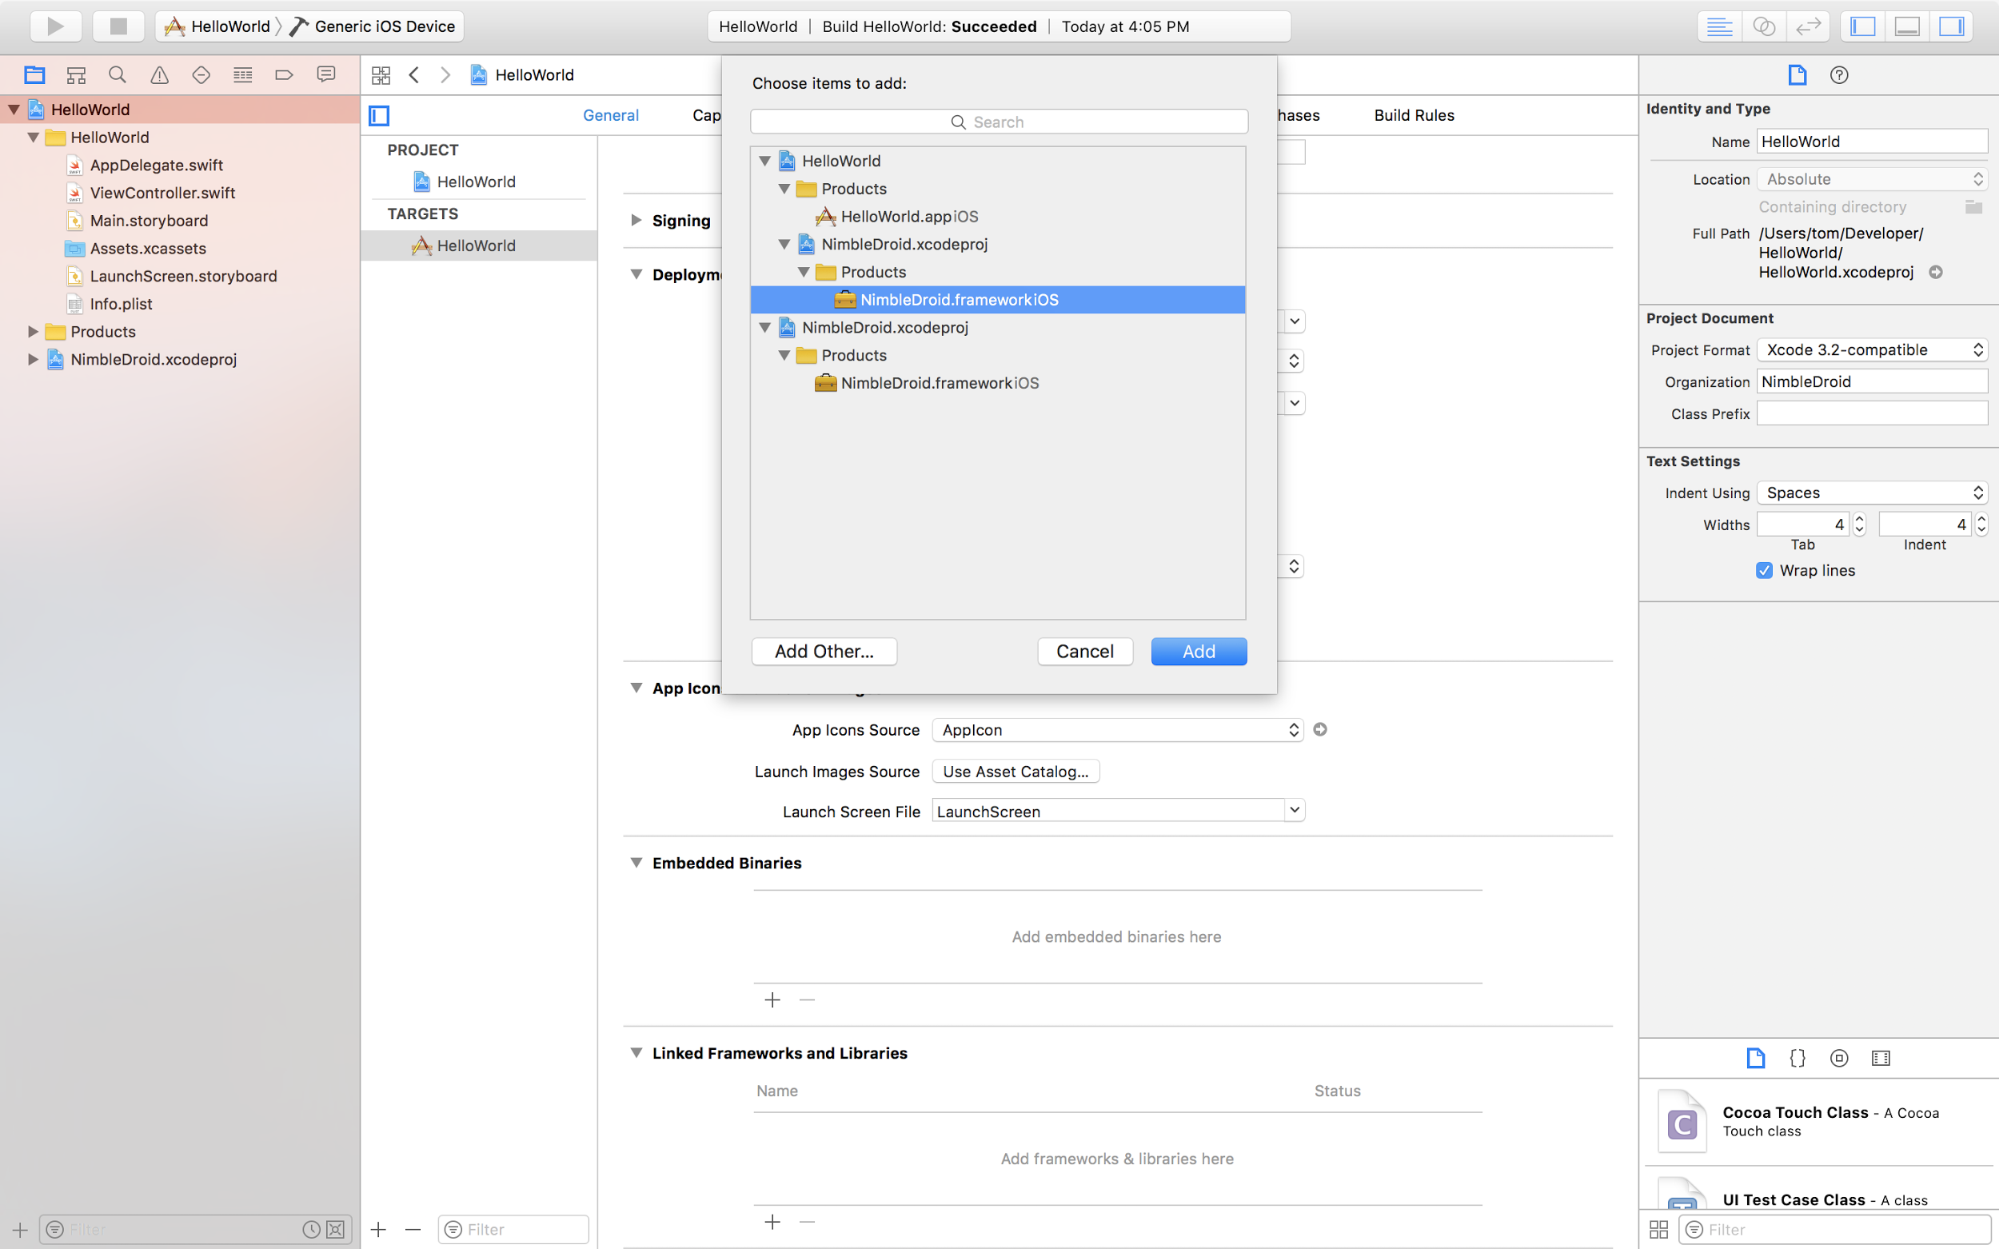
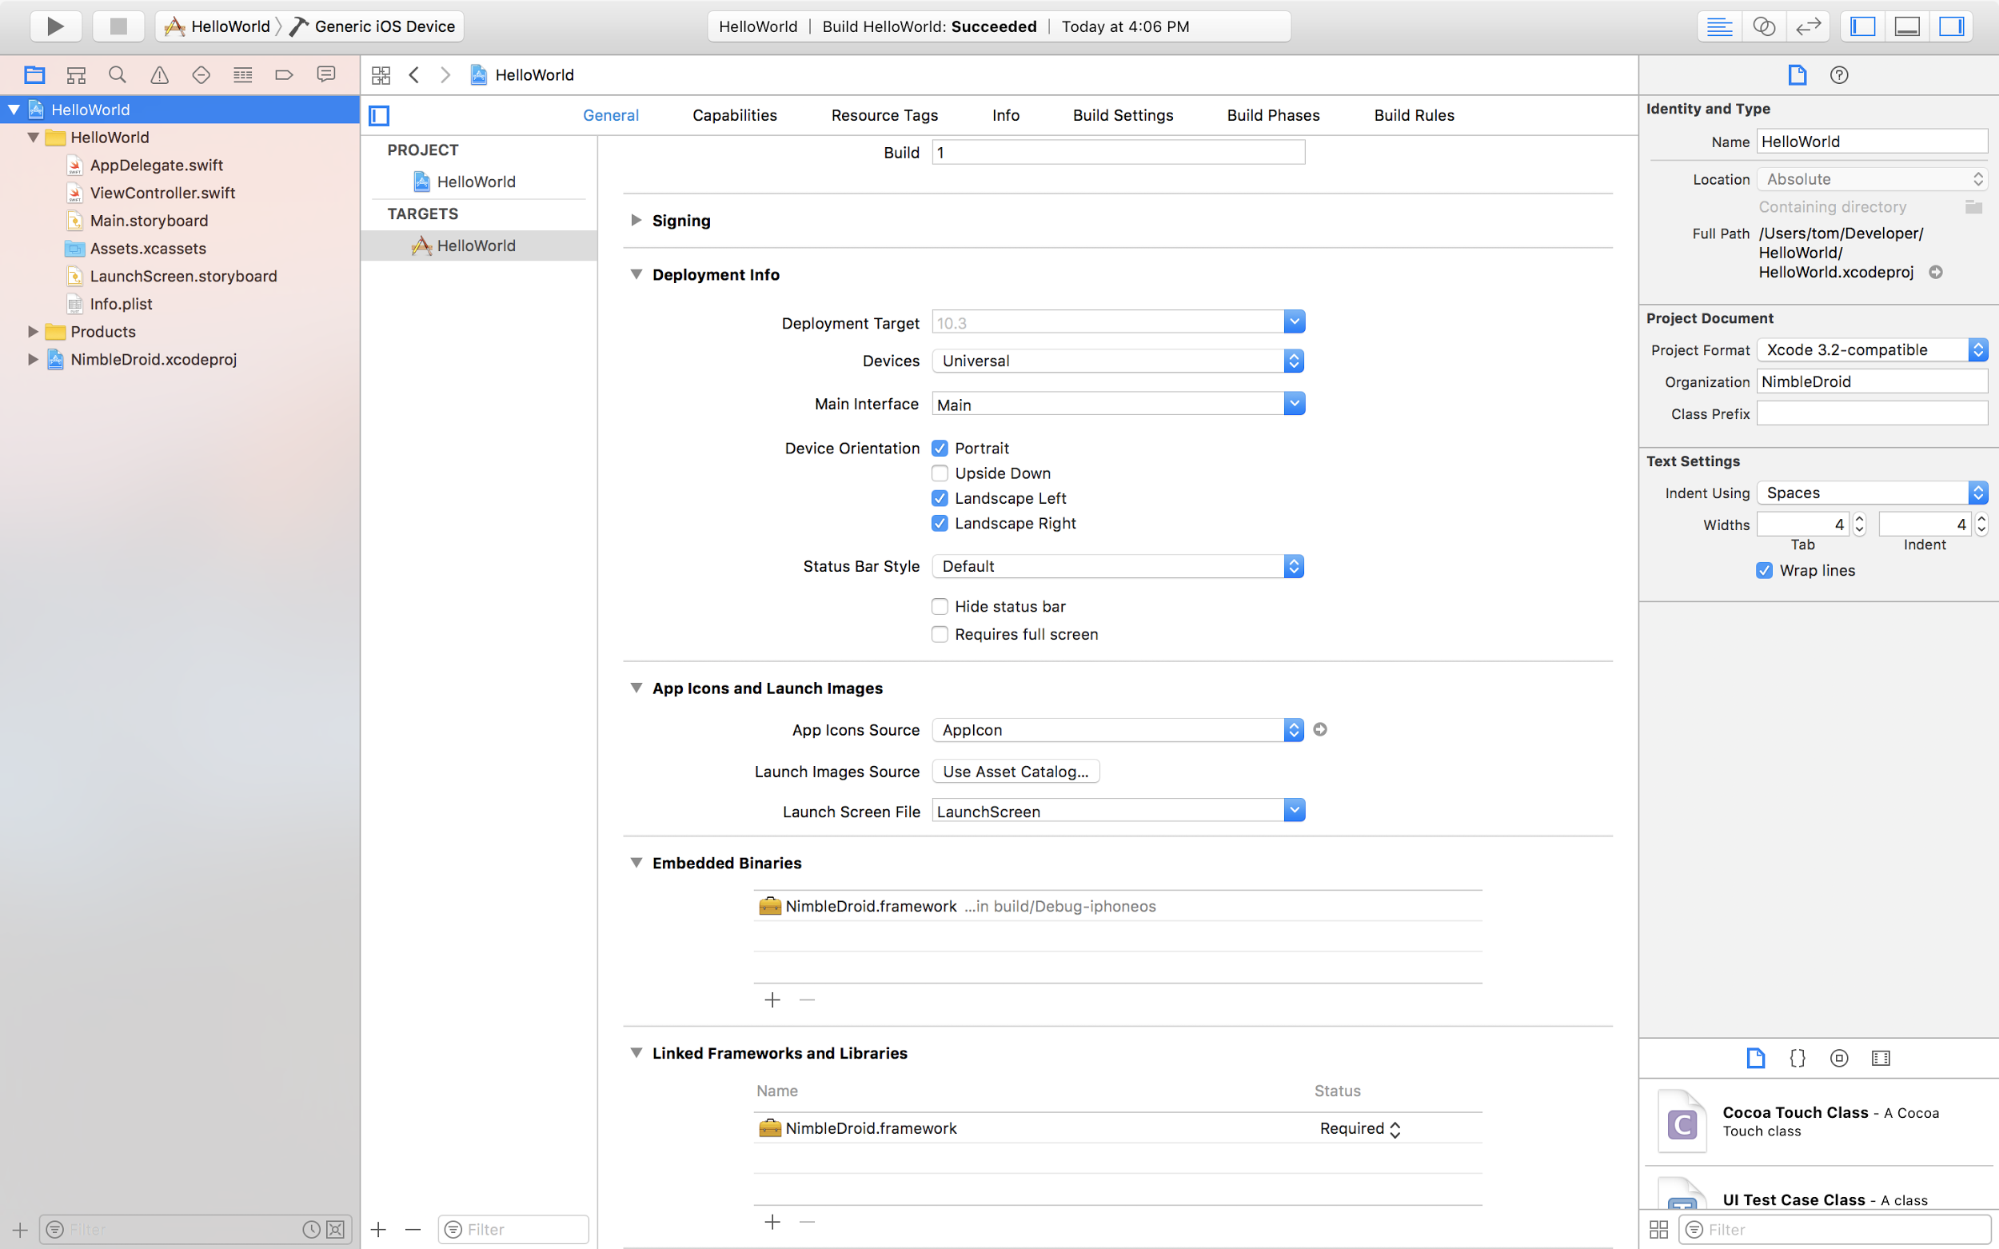
Clone the framework repo, open the framework directory in a new Finder window and drag NimbleDroid.xcodeproj into your application’s Project Navigator in Xcode nested inside your application's project. Select your app target and go to the General tab. In the Embedded Binaries section, add the framework by using the ‘+’ button and choosing “NimbleDroid.framework iOS” under the Products folder for NimbleDroid.xcodeproj. The framework should appear in the Embedded Binaries section and the Linked Frameworks and Libraries section. Finally, rebuild your project to generate the necessary NimbleDroid module.
Note: If your Scheme uses a custom Configuration, you will likely encounter a Module 'NimbleDroid' not found error. You will need to add your Configuration to the NimbleDroid project. To do so, select the NimbleDroid project in the Project Navigator and select the Info tab. Then under Configurations, use the '+' button and select 'Duplicate "Release" Configuration', rename the new Configuration to match your Scheme's Build Configuration, and finally rebuild your project.
Initializing the framework
To initialize the framework, you must call the setup method in your app delegate’s application:willFinishLaunchingWithOptions: method.
Swift
import NimbleDroid
and call the following method in application(_:willFinishLaunchingWithOptions:)
NDScenario.setup()
Objective-C
@import NimbleDroid;
and call the following method in application:willFinishLaunchingWithOptions:
[NDScenario setup];
Adding Cold Startup Bookend
By placing a special coldStartupEnd bookend somewhere in your app’s coldstart code path, you can explicitly define where the profiler should end profiling for the Cold Startup Scenario with a "bookend".
This bookend must appear along your cold start code flow from launching the app without any interaction from the user, otherwise we will not be able to discover it.
Swift
import NimbleDroid
and place a single coldStartupEnd bookend anywhere along the cold start code path
NDScenario.coldStartupEnd()
Objective-C:
Note: Objective-C requires you to set the app target's Build Options setting 'Always Embed Swift Standard Libraries' to 'Yes' under the Build Settings tab.
@import NimbleDroid;
and place a single coldStartupEnd bookend anywhere along the cold start code path
[NDScenario coldStartupEnd];
Creating custom Scenarios (Optional)
To profile a Scenario other than Cold Startup, you can use the XCTest UI Testing framework along with a pair of matching start and end bookends for each Scenario. You must ensure that anywhere you place a bookend in your app can be reached by a UI test.
Note: make sure you have imported the framework as described in the Initializing the framework section
Adding bookends
Place a pair of bookends around the code you want profiled. You will give each bookend set a unique ID.
Swift
NDScenario.begin(bookendID: "loadFeed")
//
// your measured app code
//
NDScenario.end(bookendID: "loadFeed")
Objective-C
[NDScenario beginWithBookendID:@"loadFeed"];
//
// your measured app code
//
[NDScenario endWithBookendID:@"loadFeed"];
You can have as many matching pairs of bookends in your app as you like as long as the bookendID is unique for each pair. Take note of the test identifiers you use to drive the app to these code paths in your app, we will need them to run your tests.
Note: Objective-C requires you to set the app target's Build Options setting 'Always Embed Swift Standard Libraries' to 'Yes' under the Build Settings tab.
Sending us your app manually
- Archive your app and export it for Development Deployment, and send us the IPA file
- We will also need your dSYMs to generate meaningful call stacks and generate issues. You should be able to find your archive in Xcode’s Organizer, right-click it to Show in Finder, then right-click the .xcarchive itself to Show Package Contents. Please compress the dSYMs directory and send it to us along with your IPA.
If you intend to use the Custom Scenarios feature, we will need:
- Your test runner app bundle. Please compress the *UITests-Runner.app bundle directory, along with your generated .xctestrun file, and send it to us along with the IPA
- The list of test identifiers you’d like to run to trigger your bookends
Advanced Usage
Preparing for Continuous Integration
To use NimbleApp for iOS in your CI process, you must conform to a few requirements.
- If you have followed the above instructions, your IPA should already be ready without any further work.
If you intend to use the Custom Scenarios feature, you must make sure that your test runner bundle is compressed in a zip file and matches our expected directory structure.
- The simplest way to do this is to execute the zip command directly, as follows:
zip -r MyAppUITests-Runner.zip MyAppUITests-Runner.app
- If you prefer to use your own compression command, verify that the standard macOS unzip binary is capable of extracting the files and that the *UITests-Runner.app bundle directory is in the zip archive's root directory, e.g.,
$ unzip -l MyAppUITests-Runner.zip
Archive:  MyAppUITests-Runner.zip
  Length      Date    Time    Name
  ---------  ---------- -----   ----
          0  10-04-2017 11:56   MyAppUITests-Runner.app/
  ...
Additionally, we will need to know the test identifiers of the XCTest UI tests you've written to trigger the bookends in your app.
- Maintain a comma-delimited string of test identifiers (TestClass/TestMethod) that can be passed to a HTTP POST parameter, e.g., "MyAppUITests/testFeedRefresh,MyAppUITests/testShoppingCart"
Using the REST API
Endpoint
The base endpoint for the latest API version is https://nimble.app/api/v2/
Authentication
All authentication is done using HTTP Basic auth. Each NimbleApp user has an API key (example format: bfca920e348a0c88af00b60e90ae7d4e) available on their Account page for use with API requests. The API key can be used in either the user or password fields for basic auth, authentication will work so as long as the key is in at least one of those fields.
Uploading
At its simplest, you can use a single HTTP POST to upload your IPA for profiling.
Simple example (curl)
curl -v -F ipa=@MyApp.ipa -u bfca920e348a0c88af00b60e90ae7d4e: https://nimble.app/api/v2/ipasAdvanced example (curl)
curl -v -F ipa=@MyApp.ipa -F test_runner=@MyAppUITests-Runner.zip -F test_identifiers="MyAppUITests/testFeedRefresh" -u bfca920e348a0c88af00b60e90ae7d4e: https://nimble.app/api/v2/ipasParameters
| Parameter | Values | Default | Notes |
|---|---|---|---|
test_identifiers |
comma-delim String | Comma delimited list of one or more XCTest test identifiers in the format TestClass/TestMethod. Must be used in conjunction with test_runner e.g., "MyAppUITests/testFeedRefresh,MyAppUITests/testShoppingCart"
|
|
test_runner |
File | XCTest UI Testing bundle in a compressed zip file for running custom Scenarios. Must be used in conjunction with test_identifiers | |
dsyms |
File | dSYMs zip file to symbolicate method addresses in profiling results | |
launch_args |
String | Arguments passed to the app on launch | |
device_config |
comma-delim string of ios10 ios11
|
ios10 |
Comma delimited list of one or more device configurations under which to run profiles. Listing more than one value will cause profiles to be run for each listed value e.g., "ios10,ios11" |
commit |
String | Git commit hash of uploaded IPA, for labeling and reference | |
upload_label |
String | Replaces default upload labeling algorithm with user-provided string |